Sunday, December 6, 2009

Bottle Whimsical Snowmen!

Hello, everyone! For this post I will be joining My Romantic Home's Show & Tell Friday post. This is the result of our latest craft group meeting. Jessica showed us all how to make snowmen out of vintage bottles and salt shakers. We filled them with tinsel, beads, buttons, glitter, and sequins. We made the heads out of some type of clay that air dries. We used toothpicks for the noses. It was alot of fun and the first time that we got to hang out in the little cottage behind my house. It was pretty cold outside and I just bought a new utility room heater and I was very pleased with how warm it kept the room. It kept it at a cozy 73 degrees. I finally moved all my craft stuff out there last week. I plan to update with some pictures of my craft room once I get it nice and organized.

These are Jessica's snowmen. I love how whimsical these turned out!

Some more snowmen....
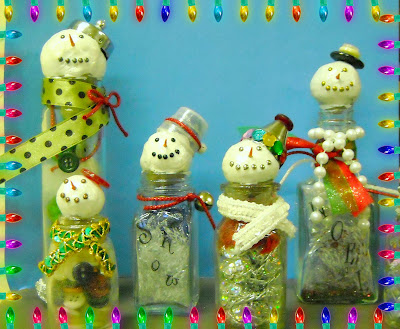
Amy made this group of Snowmen mostly to give away as gifts for friends and family. They are all way cute!

These are my Mr & Mrs Clause figurines. Mrs Clause started out as an angel. I didn't like how that was turning out so I made The Clauses instead.

Happy ThanksGiving!


Happy be-lated ThanksGiving! I apologize for not upadating my blog sooner. I have been very busy making my Christmas gifts this year. Time has slipped by so quickly. I will update pictures of all the gifts I make after Christmas. But for now I would like to show you pictures of the first ThanksGiving Brian and I have hosted at our house! It was a lot of work preparing everything but really worth it! Brian's Dad, Mike, made the green bean casserole-yummy! Sitting next to him is his good friend Pat.

It was a great day and was wonderful to be able to spend it with family. The guy in the green shirt at the end of the table is my brother-in-law, John and sitting next to him is my sister, Suzie. Jon had just returned from a year long tour in Iraq so we were very thankful to have him back home safe and sound. All in all, a great day! Stay tuned for a Christmas decoration project.....

Buffet style service....

Here is a shot of our family members patiently awaiting a very late ThanksGiving lunch.

Sunday, November 1, 2009

Halloween Pot-Luck


Happy Halloween everyone! We had a very small get-together at our house last night for Halloween. It was fun and pretty casual. It was a pot-luck with a Halloween theme so everyone made a "creepy" dish. I made the main course which was the gory looking skeleton dish. Jessica made the creepy lady finger cookies. Amy made the breadstick pepperoni fingers and these yummy cumin spiced cheese biscuits. We had lots of fun and gave out lots of candy. We had to make an emergency candy run as I understimated how many kids would show up. Also, I bought the lamest Halloween candy ever and it was decided that from now on Brian will be in charge of that in our house. Had a great weekend!

Monday, October 26, 2009

"Affair of the Heart" Craft Fair Weekend!!


I finally had the opportunity to check out the "Affair of the Heart" craft fair in OKC. It was so much fun! I was invited to go by the ladies in my craft group who happen to have an extra ticket. We got lots of great ideas for upcoming projects and had a really good time. We did lots of walking as we visited most of the six buildings.

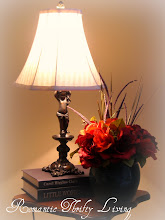
These are pictures of some of the things I purchased at the craft fair. I mostly purchased from the antiques dealers. I bought these things from a vendor who said this would be her last year at the fair so she had great deals! She used to make stained glass lampshades so this cherub lamp base was one of many she collected over the years for the lampshades. I love it! The rose candle holder was only $1! Finally, I bought the box with the globes because I liked that it was masculine looking which is nice since most of the things I purchase have pretty feminine shapes. I thought it would be great to keep my cell phone and keys in. Overall, we had a great weekend!

Monday, October 19, 2009

First Crafting Group Meeting!


This Sunday was the first day our crafting group was able to meet. I led the first meeting and taught Donna Dewberry's one-stroke painting method. It was a bit of a challenge to get out of my head and try as best I could to explain what I was doing as I was painting. I recently taught myself how to paint using the one-stroke method by checking out books from my public library and by watching videos of Donna on You Tube. I hope everyone had fun and hopefully learned something new. Everyone has promised to send me pictures of their finished projects so that I can post them on this blog. The pictures above are some of the projects I finished this weekend. I have the most trouble with the leaves. I guess I will have to keep practicing. Thanks to everyone for coming and I am looking forward to the next time we meet! Next time someone else will lead the group and I will get to learn something new!

Wednesday, October 14, 2009

I love Painted Vintage Tole Trays!


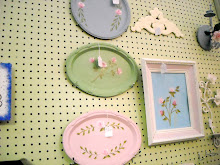
Painted Vintage Tole Trays have been a favorite of mine for a long time! Aren't these gorgeous? Since I cannot afford to buy them right now, I have taught myself to paint using Donna Dewberry's One-Stroke Method. Here is a sample of a flower I painted on a trash can a few months ago.
I'm excited to try my hand at painting my own beautiful tole trays. I plan to paint a few to sprinkle around my house. I have a small craft group meeting at my house this weekend and this will be our first project. I think it will be fun! By the way, these trays are on sale right now on E-bay. My favorite is the one with the robin's egg blue background!

Sunday, October 11, 2009

DIY Fall Topiaries


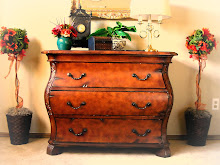
Ta da!! Here is my most recent project. I made these fall topiaries a few weeks ago, I just hadn't had time to take pictures. These artifical floral topiaries are almost 4 feet tall. Each topiary only cost around $10 in materials! Not bad cost for the size.
I permanently attached the green roses but made the sunflowers and fall leaves removable. I will probably switch these with red roses, pine cones and berries for the Holidays. The bows can also easily be switched out according to the seasons.
I purchased most of the materials at the Dollar Tree except for the sunflowers and fall leaves which I purchased at Michael's. Making the base for a topiary is the most challenging part. It's especially challenging if you are trying to save some money and are trying to recycle materials like I did. Here are the instructions for the bases I made.
First, I applied a stain to the basket by mixing dark brown acrylic paint with a little bit of red and diluting with water. After it dried, I used a small empty coffee can (11 oz) and placed it in the center of the basket. Then I stuffed grocery paper bags around it to wedge it in place. After that, I hot glued the empty cardboard ribbon spool to the bottom of the can. Then I grabbed the dowel (also painted brown) and applied hot glue to the end and glued it into the spool's pre-existing hole. I wedged more strips of grocery paper bags into the coffee can to stabilize the dowel. The rest was easy. I filled the basket with more crumpled strips of paper sacks until I got about 1/10 from the top. Then I simply hot glued spanish moss on top of that.
That was the hardest part of making these topiaries.
The actual floral ball is easy and fun to make. Simply hot glue moss to a round floral foam and apply the chosen flowers with hot glue or cut the stem to size using wire cutters and stick them into the foam so that they are removable. Here is a simple way to make the cheapest round floral foam out of a $1 square foam. This was a fun project but a bit time consuming. I love that I can change these according to season! I am pretty happy with the results! What do you think?